Updated for Flash Builder 4 release version 🙂
Data Centric Development (DCD) in Flash Builder 4 allows developers to build Flex front end for LiveCycle Data Services (LCDS) Data management service destinations with just couple of clicks. Continue reading to see how Flash Builder and LCDS are improving J2EE developer productivity.
In this article we will be building a Flex application for a Data Management service destination in the samples application called lcds-samples bundled with LiveCycle Data Services ES2.
Install LCDS 3
Download LiveCycle Data Services 3 from this URL http://www.adobe.com/go/trylivecycle_dataservices. You will be downloading a file named lcds3-win.exe/lcds3-mac.zip, execute this file to install. I have installed LCDS 3 with Tomcat to C:\lcds3
Install Flash Builder 4
Download and install Flash Builder 4 from here http://www.adobe.com/products/flashbuilder/
Enabling RDSDispatchServlet
Flash Builder uses the RDSDispatchServlet (part of LCDS) to retrieve destinations information from the server. By default the RDSDispatchServlet is commented out in web.xml. Open C:\lcds3\tomcat\webapps\lcds\WEB-INF\web.xml using a text editor and remove comment around RDSDispatchServlet Servlet definition and the URL mapping as shown below. Also set the useAppserverSecurity parameter value to “false” as shown below.
<servlet>
<servlet-name>RDSDispatchServlet</servlet-name>
<display-name>RDSDispatchServlet</display-name>
<servlet-class>flex.rds.server.servlet.FrontEndServlet</servlet-class>
<init-param>
<param-name>useAppserverSecurity</param-name>
<param-value>false</param-value>
</init-param>
<load-on-startup>10</load-on-startup>
</servlet>
<servlet-mapping id=”RDS_DISPATCH_MAPPING”>
<servlet-name>RDSDispatchServlet</servlet-name>
<url-pattern>/CFIDE/main/ide.cfm</url-pattern>
</servlet-mapping>
Defining item class name
Set the item-class property of the Data Management service destination to the name of the object type which the assembler is expecting. Flash Builder 4 DCD requires this property to be set for the destinations you want to consume using DCD in Flash Builder. All the sample destinations in LCDS 3 have this property set. Sample destination used in this article has item-class property set to flex.samples.product.Product class as shown below.
XML Snippet below is from C:\lcds3\tomcat\webapps\lcds\WEB-INF\flex\data-management-config.xml
<destination id=”inventory”>
<properties>
<source>flex.samples.product.ProductAssembler</source>
<scope>application</scope>
<item-class>flex.samples.product.Product</item-class>
<metadata>
<identity property=”productId”/>
</metadata>
<network>
<paging enabled=”false” pageSize=”10″ />
</network>
</properties>
<adapter ref=”java-dao”/>
</destination>
Start LCDS server
Start LCDS samples data base from the start menu, start -> All Programs -> Adobe -> LiveCycle Data Services ES 3.0 -> Start Samples Database
Start LCDS server from the start menu, start -> All Programs -> Adobe -> LiveCycle Data Services ES 3.0 -> Start LiveCycle Data Services Server
Please make sure both the database and the server are started.
We have everything ready to develop a Flex application for data management service destinations using Flash Builder 4.
Create a Flex project
Create a Flex project from File -> New -> Flex Project. You will see a window launched with options to fill project properties as shown in the image below. Fill project properties as shown in the image below.
In this screen:
- Set project name to LCDSSampleProject
- Let the Application type be Web
- Use default Flex SDK (Flex 4.0)
- Set the Application server type to J2EE
- Select Use remote object access service check box
- 6. Select LiveCycle Data Services ES
- 7. Click next to continue
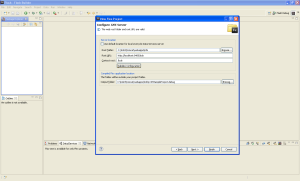
Now we need to set the server properties, you will see a screen with options to set the server properties as shown in the image below.
In this screen:
- Set the Root folder to c:\lcds3\tomcat\webapps\lcds
- Set the Root URL to http://localhost:8400/lcds
- Set the Context root to /lcds
- Leave the Output folder to default, which is on the server
- Click on Validate Configuration to validate the details
- Click finish to continue
All we have to do now is to see how we can consume the service and create a Flex application. With Flash Builder 4 this is very simple, Data centric Development (DCD) features in Flash Builder 4 lets us easily consume data management services and bind them to UI controls.
Consuming data management services from Flash Builder 4
- Select the Data/Services window shown in the image above. If this is not visible, select it from Window -> Data/Services
- Click on “Connect to Data/Service” (highlighted in the image) in the Data/Services window
You will see a window launched with options to select the type of service as shown in the image below.
In this screen, select LCDS and click on Next to continue. Flash Builder will display a window asking for RDS credentials. Since we turned off security for our RDSDispatchServlet by setting the “useAppserverSecurity” parameter to “false” in the web.xml, select “No password required” and click on OK to continue.
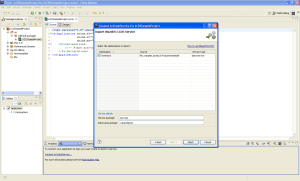
Now Flash Builder will retrieve all the Remoting and Data Management destinations exposed by the web application and displays as shown in the image below.
Destinations whose service-type is remoting-service are the Remoting destinations and the ones whose service-type is data-service are the Data Management service destinations. In this sample we will use the “inventory” data management service destination. Select the “inventory” destination and click on Finish to continue.
Flash Builder will generate all code required to consume the service selected and will list the Inventory service in the services explorer as shown in the image below.
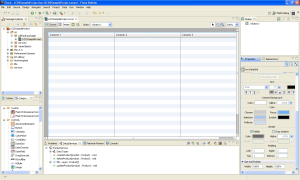
You can also see that the return types for the operations (functions/methods of assembler) are properly set. Now that we have the service created, let’s bind the data to a UI control. Switch to design view as shown in the image below.
In this screen:
- Set the layout of the Application to spark.layouts.VerticalLayout
- Drag and drop a DataGrid on to the design view
- Set the width of the DataGrid to 100% and height to 100%
Now let’s bind the data to DataGrid.
In this screen:
- Select the DataGrid
- Right click on the DataGrid
- Select Bind To Data
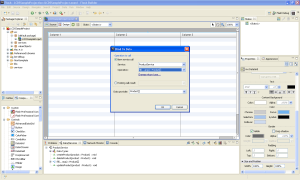
You will see a window launched with options to select the service as shown below.
In this screen:
- Select New service call
- Set the Service to ProductService
- Set the Operation to fill(…args): Product[]
- Set the Data Provider to Product[]
- Click on OK to continue
The fill(… args) function accepts optional parameters and so Flash Builder will automatically switch to code view to let you enter the arguments to be passed to the fill() function. In this example we will not pass any parameters, so leave the fill() function arguments empty as shown in the image below.
Switch to design view and you will see that the DataGrid will have columns for Product properties as shown in the image below.
Configuring DataGrid columns
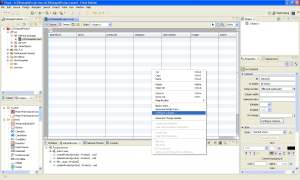
Flash Builder 4 has an excellent feature which allows developers to configure columns. Select the DataGrid. Right click on the DataGrid and select “Configure Columns …” as shown in the image below.
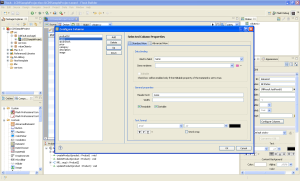
A window with options to configure the columns for the DataGrid will be launched as shown in the image below.
In this screen:
- Use the up and down buttons to re-arrange columns as shown in the image above
- Click on OK
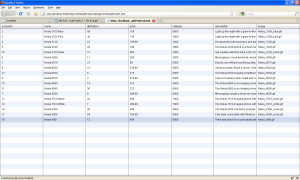
Save and run the application. Application will launch in the browser. You can observe the application sending request to the server and displaying the response in the DataGrid as shown in the image below.
More articles on how to use Flash Builder 4 are available at this URL https://sujitreddyg.wordpress.com/flash-builder-4/
We developed a Flex front end for Data Management service destination in just few minutes. Flash Builder 4 and LCDS rocks 🙂









 Posted by Sujit Reddy G


