Updated Flash Builder 4 Tutorials

March 31, 2010

Flash Builder 4 is released and available for download here http://www.adobe.com/products/flashbuilder/ There lots of new features in Flash Builder 4, you can find top new features here http://www.adobe.com/products/flashbuilder/?view=topnew

I updated my article on Flash Builder 4 for the release version. You can find the complete list here https://sujitreddyg.wordpress.com/flash-builder-4/.

Following are the articles updated:

BlazeDS/Java/LCDS

Building Flex application for BlazeDS Remoting destinations using Flash Builder 4

Building Flex applications for Java based HTTP Services using Flash Builder 4

Using Flash Builder 4 for earlier BlazeDS builds

Tutorial on model-driven development using Flash Builder 4 and LiveCycle DS 3

Building Flex application for LCDS Data Management services using Flash Builder 4

Building Flex and Java based CRUD application using Flash Builder 4

Building Flex and LCDS based CRUD application using Flash Builder 4

PHP

Bulding Flex application for a PHP class using Flash Builder 4

Building a database based app using Flex and PHP with Flash Builder 4

HTTP Service

Building Flex applications for Java based HTTP Services using Flash Builder 4

Building Flex applications for PHP based HTTP Services using Flash Builder 4

Consuming JSON using Data Centric Development (DCD) feature in Flash Builder 4

OTHER

Built in Data Paging using Flash Builder 4

Client Side Data Management using Flash Builder 4

Adobe Rocks 🙂


Application developed using Flex 4 and DCD targeting Flash Player on Android Device

March 4, 2010

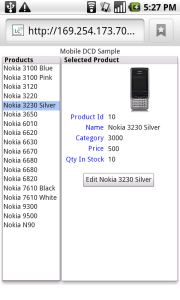
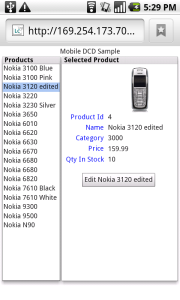
Used Flex 4 and Data-Centric Development (DCD) in Flash Builder 4 to create a application which can be used in devices with Flash Player 10.1 support. This applications loads data from tomcat server configured with LiveCycle DS; Lets the user view the data and edit the same. Please find below the screen shots of the application running on Google Nexus One with Flash Player 10.1 🙂

Note: I took the screen shots of the application running on Google Nexus One phone using Dalvik Debug Monitor packaged with Android SDK

I also wanted to see if I can use the same application to target Flash Player running on bigger screens like Mac. Since I used Flex 4, I just created different skins for my custom components so that the applications looks good when launched from a Mac or PC. After creating the skins, all I had to do was to change the <style> tag in the main application to point to the css configured with my new skins and re-compile my application. Please see below the screen shot of the application launched from Firefox on my mac 🙂

The application developed here is consuming data from a Data Management Service destination of LiveCycle DS (LCDS) and so any changes to the data on the mobile devices is pushed to all other clients viewing the same data 🙂 In the last image below, you can see the changes made on the mobile being pushed onto the application running on Mac.

Screen Shots:

View Products

View Products

View Products 2

View Products 2

Edit Product View

Edit Product View

Editing Product Name using Android Keyboard

Editing Product Name using Android Keyboard

Viewing Edited Product

Viewing Edited Product

Application Running on Mac

Application Running on Mac

Adobe Rocks 🙂


Slides and Source files from Data Centric Development session at devsummit

December 3, 2009

I had great time presenting Data Centric Development on Adobe Flash Platform at Adobe devsummit Chennai and Hyderabad. Thanks to all the speakers, community members and delegates for making this devsummit a great success 🙂 Please download the presentation and source files for the demos from the URLs below.

PRESENTATION

Please find the presentation (Some of my slides are from Christophe Coenraets presentation at Adobe MAX) at this URL https://acrobat.com/#d=iXpvdvfVGYYunqRt*xZ*6A

SOURCE FILES FOR DEMOS

Please download the Java and PHP source files used in the first two demos and set up as explained in the article at this URL http://flashahead.adobe.com/events/devsummit2009/lbd/lbd_setup_instructions.pdf

Flash Builder 4 DCD with Java

Demonstrated how Data-Centric Development features in Flash Builder 4 can be used to easily integrate Flex with J2EE backend. Please find tutorial on using Flash Builder with J2EE backend at this URL https://sujitreddyg.wordpress.com/2009/06/01/building-flex-application-for-blazeds-remoting-service-using-flash-builder-4/

Source file (Flash Builder 4 project): http://sujitreddyg.com/presentations/devsummit2009/demo1.fxp

Flash Builder 4 DCD with PHP

Demonstrated how Data-Centric Development features in Flash Builder 4 can be used to easily integrate Flex with PHP backend. Please find tutorial on using Flash Builder 4 with PHP backend at this URL https://sujitreddyg.wordpress.com/2009/06/01/building-flex-application-for-a-php-class-using-flash-builder-4/

Source file (Flash Builder 4 project): http://sujitreddyg.com/presentations/devsummit2009/demo2.fxp

Model Driven Development

Demonstrated how to do model driven development using Flash Builder 4 and LiveCycle Data Services 3. Please find tutorial on model driven development and setup instructions at this URL https://sujitreddyg.wordpress.com/2009/06/18/tutorial-on-model-driven-development-using-flash-builder-4-and-livecycle-ds-3/

Source file (Flash Builder 4 project): http://sujitreddyg.com/presentations/devsummit2009/demo3.fxp

Adobe Community Rocks 🙂


LiveCycle Data Services (LCDS) 3 Released

November 21, 2009

LiveCycle Data Services 3.0 is released as part of LiveCycle ES 2 🙂

What’s New

  1. Model driven development of Flex applications
  2. Reliable Messaging
  3. Throttling
  4. Edge Server
  5. Load test harness: Simulate Flex clients in Java

Documentation:

LiveCycle Data Services ES2 Quick Starts – http://www.adobe.com/go/learn_lcds3_modeling_howto

Other documentation – http://help.adobe.com/en_US/livecycle/9.0/lc_ds_list.html

Download Developer Version

You can Download the trial or a free developer version to get started from this URL http://www.adobe.com/go/trylivecycle_dataservices

Please find more details regarding the announcement on Anil Channappa’s (Product Manager LCDS and BlazeDS) blog at this URL http://anilchannappa.org/2009/11/20/lcds-3-0-released/

Congratulations to the entire LiveCycle Data Services team … LCDS team Rocks 🙂


Speaking at Adobe devsummit Chennai and Hyderabad

November 9, 2009

I will be speaking on Data Centric Development on Adobe Flash Platform and also will be handling the Learn by doing – Part 2: Integrate with server session along with Prashant Singh.

Summit attendees will get a complimentary Flex Builder 3 Professional License. Please find session abstracts and more details below 🙂

I am speaking at Adobe devsummit

Adobe devsummit is the biggest annual developer event focused on the Adobe Flash Platform. This event attracts a rich demographic mix spanning designers and developers in India. Adobe has consistently showcased path breaking technologies at devsummit.

For the first time Adobe devsummit is coming to Chennai, India (24th November, 2009) and Hyderabad, India (1st December, 2009). Please find more details on Adobe devsummit Chennai and Hyderabad and register at this URL http://endtoend.in/apps/forms/adobe/DevSummitNovDec09/home.html

Excited to meet the developers in Chennai and Hyderabad 🙂

Session Abstracts

Data Centric Development on Adobe Flash Platform

See how to build an engaging Flex application for any server side technology productively. While application created with Flex and Flash already have ability to communicate with various back ends, see how data services can add power to a back end.

This session starts with showing how to use Data-Centric Development feature in Flash Builder 4 to productively create Flex applications connecting to various server technologies. Next, see how the brand new model-driven development feature of LiveCycle Data Services ES allows you to build and maintain data-driven Flex applications with an unprecedented level of productivity and flexibility.

Learn by doing – Part 2: Integrate with server

Learn how to connect your Flex application to servers for retrieving/storing data; and also deploy your application. We will demonstrate how you can connect to various server technologies like Java, .NET and PHP using remoting and web services. You will also learn how to use the Data-Centric development feature in Flash Builder 4 to develop Flex applications that connect with various server technologies.

If you are living in and around Chennai or Hyderabad, go ahead and register for the summit 🙂

Catch you all at the summit 🙂


Building Flex and LCDS based CRUD application using Flash Builder 4

October 13, 2009

Updated for Flash Builder 4 release version 🙂

In this article we will create a CRUD application using Adobe Flex and LiveCycle Data Services. Flash Builder 4 allows developers to build Flex front end for LiveCycle Data Services (LCDS) Data management service destinations with just couple of clicks, so we will use Flash Builder 4 to develop this application.

Below are the steps we will follow to complete our application

  1. Set up LiveCycle Data Services
  2. Use Flash Builder to generate Flex code to invoke methods in Java class on the server
  3. Retrieve data from server and display in the application
  4. Allow user to add/update/delete entries from the application

In this article we will be building a Flex application for a Data Management service destination in the samples application called lcds-samples bundled with LiveCycle Data Services ES2.

Article allows you to skip any of steps mentioned above and copy the code 🙂 Let’s get started 🙂

You can download the completed project from here http://sujitreddyg.com/fb4articles/release/LCDSCRUD.fxp

Install LCDS 3

Download LiveCycle Data Services 3 from this URL http://www.adobe.com/go/trylivecycle_dataservices. You will be downloading a file named lcds3-win.exe/lcds3-mac.zip, execute this file to install. I have installed LCDS 3 with Tomcat to C:\lcds3

Install Flash Builder 4

Download and install Flash Builder 4 from here http://www.adobe.com/products/flashbuilder/

Enabling RDSDispatchServlet

Flash Builder uses the RDSDispatchServlet (part of LCDS) to retrieve destinations information from the server. By default the RDSDispatchServlet is commented out in web.xml. Open C:\lcds3\tomcat\webapps\lcds-samples\WEB-INF\web.xml using a text editor and remove comment around RDSDispatchServlet Servlet definition and the URL mapping as shown below. Also set the “useAppserverSecurity” parameter value to “false” as shown below.

<servlet>

<servlet-name>RDSDispatchServlet</servlet-name>

<display-name>RDSDispatchServlet</display-name>

<servlet-class>flex.rds.server.servlet.FrontEndServlet</servlet-class>

<init-param>

<param-name>useAppserverSecurity</param-name>

<param-value>false</param-value>

</init-param>

<load-on-startup>10</load-on-startup>

</servlet>

<servlet-mapping id=”RDS_DISPATCH_MAPPING”>

<servlet-name>RDSDispatchServlet</servlet-name>

<url-pattern>/CFIDE/main/ide.cfm</url-pattern>

</servlet-mapping>

Defining item class name

Set the item-class property of the Data Management service destination in Data Management service configuration file (C:\lcds3\tomcat\webapps\lcds-samples\WEB-INF\flex\data-management-config.xml) to the name of the object type which the assembler is expecting. Flash Builder 4 DCD requires this property to be set for the destinations you want to consume using DCD in Flash Builder. All the sample destinations in LCDS 3 beta 3 have this property set. Sample destination used in this article has item-class property set to flex.samples.product.Product class as shown below.

<properties>

<source>flex.samples.product.ProductAssembler</source>

<scope>application</scope>

<item-class>flex.samples.product.Product</item-class>

<metadata>

<identity property=”productId”/>

</metadata>

<network>

<paging enabled=”false” pageSize=”10″ />

</network>

</properties>

</destination>

Start LCDS server

Start LCDS samples data base from the start menu, start -> All Programs -> Adobe -> LiveCycle Data Services ES 3.0 -> Start Samples Database

Start LCDS server from the start menu, start -> All Programs -> Adobe -> LiveCycle Data Services ES 3.0 -> Start LiveCycle Data Services Server

Please make sure both the database and the server are started.

We have everything ready to develop a Flex application for data management service destinations using Flash Builder 4.

Create a Flex project

Start Flash Builder 4 from the start menu, start -> All Programs -> Adobe -> Adobe Flash Builder

Create a Flex project from File -> New -> Flex Project. You will see a window launched with options to fill project properties as shown in the image below. Fill project properties as shown in the image below.

In this screen:

  1. Set project name to LCDSCRUD
  2. Let the Application type be Web
  3. Use default Flex SDK (Flex 4.0)
  4. Set the Application server type to J2EE
  5. Select Use remote object access service check box
  6. Select LiveCycle Data Services ES
  7. Click next to continue

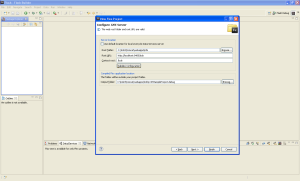
Now we need to set the server properties, you will see a screen with options to set the server properties as shown in the image below.

In this screen:

  1. Set the Root folder to c:\lcds3beta3\tomcat\webapps\lcds-samples
  2. Set the Root URL to http://localhost:8400/lcds-samples
  3. Set the Context root to /lcds-samples
  4. Leave the Output folder to default, which is on the server
  5. Click finish to continue

All we have to do now is to see how we can consume the service and create a Flex application. With Flash Builder 4 this is very simple, let’s see how Data centric Development (DCD) features in Flash Builder 4 lets us easily consume data management services and bind them to UI controls.

Consuming data management services from Flash Builder 4

  1. Select the Data/Services window shown in the image above. If this is not visible, select it from Window -> Data/Services
  2. Click on “Connect to Data/Service” (highlighted in the image) in the Data/Services window

You will see a window launched with options to select the type of service as shown in the image below.

In this screen, select LCDS and click on Next to continue. Flash Builder will display a window asking for RDS credentials. Since we turned off security for our RDSDispatchServlet by setting the “useAppserverSecurity” parameter to “false” in the web.xml, select “No password required” and click on OK to continue.

Now Flash Builder will retrieve all the Remoting service and Data Management service destinations exposed by the web application and displays as shown in the image below.

Our server settings are configured to point to the sample application bundled with LCDS called lcds-samples. This web application has lots of destinations exposed as shown in the image above. Destinations whose service-type is remoting-service are the Remoting service destinations and the ones whose service-type is data-service are the Data Management service destinations. In this sample we will use the “inventory” data management service destination. Select the destination and click on Finish to continue.

Flash Builder will generate all code required to consume the service selected and will list the Inventory service in the services explorer as shown in the image below.

You can also see that the return types for the operations (functions/methods of assembler) are properly set. Now that we have the service created, let’s create UI.

Creating UI

Please copy the code from this URL http://sujitreddyg.com/fb4articles/release/LCDSCRUD_1.mxml.txt into your main application file (LCDSCRUD.mxml in this sample). Code in the URL will add UI controls required for this sample application. After copying the code, your Flash Builder design view should look as shown in the image below.

Note: In this article to refer to a control, we will use value set for the id property of the controls.

Create Form for the Customer data type

We will display the details of the product entry selected in the listProducts control (created in previous step) in formSelectedProduct. Using Flash Builder you can bind a Form control to an entity instance.  Right click on the formSelectedProduct and select “Bind to Data” as shown in the image below.

Flash Builder will display window as shown in the image below.

In this screen:

  1. We want the Form items to be generated based on a data type (Product) so select “Data type”
  2. Select Product from the list of data types
  3. We want the form to be editable, so select the “Make form editable” check box
  4. Click Next to continue
  5. Flash Builder will display the list of properties in the selected data type as shown in the image below. Flash Builder will also assign a UI control which it will use to display the property value as shown in the image below.

In this window, you can select the items which you want to be included in the form and UI control in which you want the property value to be displayed. You can also arrange the controls in the order in which you want them to be displayed. Select, arrange the properties and modify the controls as shown in the image above.

Flash Builder will add FormItems to formSelectedProduct and binds the values of the controls under formSelectedProduct to Product instance. In this sample Flash Builder generated a Product instance with “product” as its id. So we will refer to the Product instance bound to the items in formSelectedProduct as product.

Binding data to UI Controls

Now that we have our UI is ready, let’s get the data from the server and display it in the application.

Right click on the List and click on “Bind to Data ..” as shown in the image below.

Flash Builder will display window as shown in the image below.

In this screen:

  1. Select New service call
  2. Set Service to ProductService
  3. Set Operation to fill(…args): Product[]
  4. Set Bing to field to name
  5. Click on OK to continue

The fill(… args) function accepts optional parameters and so Flash Builder will automatically switch to code view to let you enter the arguments to be passed to the fill() function. In this example we will not pass any parameters, so leave the fill() function arguments empty as shown in the image below.

In previous step we bound the service call result to listProducts component, listProducts will send a request to the fill() function on the server and displays the result.

listProducts is displaying only the name of the Product, so let’s display complete details of the product in formSelectedProduct. Right click on the listProducts and select “Generate Change Handler” as shown in the image below.

Flash Builder will generate a function which will be invoked when user selects a different item in the listProducts. Flash Builder will also switch the view to Source view as shown in the image below, so that you can write code in the handler function generated.

Add the code below to the generated change handler function as shown in the image above.

product = listProducts.selectedItem as Product;

In the code snippet above, product is the instance of Product which was bound to the formSelectedProduct. In the code above, we are passing the reference of the selected Product instance in listProducts to the Product instance bound to formSelectedProduct. This line of code will populate formSelectedProduct with details of the selected product in listProducts control.

Now, let’s keep formSelectedProduct populated with values of the first Product entry in listProducts as soon as the product data is loaded from the server.

Understanding the CallResponder

How will you know when the data is returned from the server? For each service call generated in the application there will be a CallResponder class instance associated with it. CallResponder dispatches result event when the call to the service is successful and the data returned from the server can be accessed using a property called lastResult in CallResponder instance. To map the CallResponder instance with the service call, you have to pass the reference of the AsyncToken returned by the service call to the token property of the CallResponder.  You can see service call AsyncToken reference passed to the CallResponder in listProducts_creationCompleteHandler function as shown below.

protected function listProducts_creationCompleteHandler(event:FlexEvent):void

{

fillResult.token = productService.fill();

}

CallResponder class will dispatch result event when the data is retrieved successfully from the server. You can add a handler to the result event to perform any logic when the server response is successful. In our case we will keep the first product in the listProducts to be selected and its value to be displayed in formSelectedProduct as soon as the data from the server is loaded on to the client.

Add a result event handler to the fillResult CallResponder as shown in the image below.

In the generated result handler add the following code. In the code below list is the List instance added in previous steps.

protected function fillResult_resultHandler(event:ResultEvent):void

{

if(listProducts != null)

{

listProducts.selectedIndex = 0;

product = listProducts.selectedItem as Product;

}

}

You can observe that Flash Builder also generated a Button (id=”button”) and also generated a click handler (button_clickHandler) for the Button, in which code to bind the values in the Form (id=”formSelectedCustomer”) to simpleCustomer object. Just delete the Button and the click handler.

You can see the LCDSCRUD.mxml file with code till this step at this URL http://sujitreddyg.com/fb4articles/release/LCDSCRUD_2.mxml.txt

At this point you can save and run the application. Application will launch in a browser and displays the data retrieved from the server as shown in the image below. You can view details of the products by selecting them from the list.

Performing Add/Update/Delete operations

Any data retrieved from a Data Management service destinations are managed on the client i.e. any changes made to the objects on the client will reflect on the server immediately. Since we want to commit changes to the server only on user interaction, let’s turn off the autoCommit property to false. Add the code below to listProducts_creationCompleteHandler function to turn off auto commit as shown in the image below.

productService.serviceControl.autoCommit = false;

Let’s invoke functions in the productService AS3 class when user clicks on Add/Update/Delete buttons created earlier.

Right click on the button labeled “Add” (id = “btnAdd”) and select “Generate Service Call ..” as shown in the image below.

Flash Builder displays window as shown in the image below, in which you can select the service call which you want to invoke when user clicks on the Button.

In this screen:

  1. Set the Service to ProductService
  2. Set the Operation to createProduct(arg0:Product)
  3. Click on OK to continue

The createProduct function selected expects an argument of the type Product. So Flash Builder 4 will switch to the source view and lets you enter the argument as shown in the image below.

We are creating a new instance of Product with default values to few properties and pass the reference to createProduct function. We pass the newly created Product instance reference to product so that user can modify the values of newly created product from formSelectedProduct control.

Code in the button click handler function will look as shown below. In the code snippet below we are also passing the AsyncToken returned by createProduct function to createProductResult, so that createProductResult object will dispatch result event when the service call is successful.

protected function btnAdd_clickHandler(event:MouseEvent):void

{

var newProduct:Product = new Product();

newProduct.category = “Enter category”;

newProduct.description = “Product description”;

newProduct.name = “Enter Name”;

newProduct.price = 0;

newProduct.qtyInStock = 0;

product = newProduct;

createProductResult.token = productService.createProduct(newProduct);

}

We also need to bind the changes made in the formSelectedProduct to the Product (id=”product”) so that the changes made by the user will be updated in the selected Product instance. Bind the values in the input controls to respective properties in Product instance as shown below and highlighted in the image below.
<fx:Declarations>

<valueObjects:Product qtyInStock=”{parseInt(qtyInStockTextInput.text)}”
price=”{parseFloat(priceTextInput.text)}”
category=”{categoryTextInput.text}”
description=”{descriptionTextInput.text}”/>

</fx:Declarations>


If you remember we turned off auto commit, so we need to call when user clicks the btnCommit. We also need to make sure the btnCommit is enabled only if there are any changes to the data on the client and that’s very simple just bind the btnCommit enabled property to commitRequired property as shown in the image below.

In the btnCommit_clickHandler function add the code below to commit all changes to the server.

protected function btnCommit_clickHandler(event:MouseEvent):void

{

productService.serviceControl.commit();

}

Similarly generate service calls for Update and Delete buttons, select updateProduct and deleteProduct operations respectively and pass the same product object as argument. You can view/copy the completed LCDSCRUD.mxml file at this URL http://sujitreddyg.com/fb4articles/release/LCDSCRUD.mxml.txt

Save and run your application. You will see your application launched in a browser and ready for performing CRUD operations on the database entries.

More articles on how to use Flash Builder 4 are available at this URL https://sujitreddyg.wordpress.com/flash-builder-4/

We developed a complete CRUD application for Data Management service destination in just few minutes. Flash Builder 4 and LCDS rocks 🙂


Building Flex application for LCDS Data Management services using Flash Builder 4

October 6, 2009

Updated for Flash Builder 4 release version 🙂

Data Centric Development (DCD) in Flash Builder 4 allows developers to build Flex front end for LiveCycle Data Services (LCDS) Data management service destinations with just couple of clicks. Continue reading to see how Flash Builder and LCDS are improving J2EE developer productivity.

In this article we will be building a Flex application for a Data Management service destination in the samples application called lcds-samples bundled with LiveCycle Data Services ES2.

Install LCDS 3

Download LiveCycle Data Services 3 from this URL http://www.adobe.com/go/trylivecycle_dataservices. You will be downloading a file named lcds3-win.exe/lcds3-mac.zip, execute this file to install. I have installed LCDS 3 with Tomcat to C:\lcds3

Install Flash Builder 4

Download and install Flash Builder 4 from here http://www.adobe.com/products/flashbuilder/

Enabling RDSDispatchServlet

Flash Builder uses the RDSDispatchServlet (part of LCDS) to retrieve destinations information from the server. By default the RDSDispatchServlet is commented out in web.xml. Open C:\lcds3\tomcat\webapps\lcds\WEB-INF\web.xml using a text editor and remove comment around RDSDispatchServlet Servlet definition and the URL mapping as shown below. Also set the useAppserverSecurity parameter value to “false” as shown below.

<servlet>

<servlet-name>RDSDispatchServlet</servlet-name>

<display-name>RDSDispatchServlet</display-name>

<servlet-class>flex.rds.server.servlet.FrontEndServlet</servlet-class>

<init-param>

<param-name>useAppserverSecurity</param-name>

<param-value>false</param-value>

</init-param>

<load-on-startup>10</load-on-startup>

</servlet>

<servlet-mapping id=”RDS_DISPATCH_MAPPING”>

<servlet-name>RDSDispatchServlet</servlet-name>

<url-pattern>/CFIDE/main/ide.cfm</url-pattern>

</servlet-mapping>

Defining item class name

Set the item-class property of the Data Management service destination to the name of the object type which the assembler is expecting. Flash Builder 4 DCD requires this property to be set for the destinations you want to consume using DCD in Flash Builder. All the sample destinations in LCDS 3 have this property set. Sample destination used in this article has item-class property set to flex.samples.product.Product class as shown below.

XML Snippet below is from C:\lcds3\tomcat\webapps\lcds\WEB-INF\flex\data-management-config.xml

<destination id=”inventory”>

<properties>
<source>flex.samples.product.ProductAssembler</source>
<scope>application</scope>
<item-class>flex.samples.product.Product</item-class>
<metadata>
<identity property=”productId”/>
</metadata>
<network>
<paging enabled=”false” pageSize=”10″ />
</network>
</properties>

<adapter ref=”java-dao”/>
</destination>

Start LCDS server

Start LCDS samples data base from the start menu, start -> All Programs -> Adobe -> LiveCycle Data Services ES 3.0 -> Start Samples Database

Start LCDS server from the start menu, start -> All Programs -> Adobe -> LiveCycle Data Services ES 3.0 -> Start LiveCycle Data Services Server

Please make sure both the database and the server are started.

We have everything ready to develop a Flex application for data management service destinations using Flash Builder 4.

Create a Flex project

Create a Flex project from File -> New -> Flex Project. You will see a window launched with options to fill project properties as shown in the image below. Fill project properties as shown in the image below.

In this screen:

  1. Set project name to LCDSSampleProject
  2. Let the Application type be Web
  3. Use default Flex SDK (Flex 4.0)
  4. Set the Application server type to J2EE
  5. Select Use remote object access service check box
  6. 6. Select LiveCycle Data Services ES
  7. 7. Click next to continue

Now we need to set the server properties, you will see a screen with options to set the server properties as shown in the image below.

In this screen:

  1. Set the Root folder to c:\lcds3\tomcat\webapps\lcds
  2. Set the Root URL to http://localhost:8400/lcds
  3. Set the Context root to /lcds
  4. Leave the Output folder to default, which is on the server
  5. Click on Validate Configuration to validate the details
  6. Click finish to continue

All we have to do now is to see how we can consume the service and create a Flex application. With Flash Builder 4 this is very simple, Data centric Development (DCD) features in Flash Builder 4 lets us easily consume data management services and bind them to UI controls.

Consuming data management services from Flash Builder 4

  1. Select the Data/Services window shown in the image above. If this is not visible, select it from Window -> Data/Services
  2. Click on “Connect to Data/Service” (highlighted in the image) in the Data/Services window

You will see a window launched with options to select the type of service as shown in the image below.

In this screen, select LCDS and click on Next to continue. Flash Builder will display a window asking for RDS credentials. Since we turned off security for our RDSDispatchServlet by setting the “useAppserverSecurity” parameter to “false” in the web.xml, select “No password required” and click on OK to continue.

Now Flash Builder will retrieve all the Remoting and Data Management destinations exposed by the web application and displays as shown in the image below.

Destinations whose service-type is remoting-service are the Remoting destinations and the ones whose service-type is data-service are the Data Management service destinations. In this sample we will use the “inventory” data management service destination. Select the “inventory” destination and click on Finish to continue.

Flash Builder will generate all code required to consume the service selected and will list the Inventory service in the services explorer as shown in the image below.

You can also see that the return types for the operations (functions/methods of assembler) are properly set. Now that we have the service created, let’s bind the data to a UI control. Switch to design view as shown in the image below.

In this screen:

  1. Set the layout of the Application to spark.layouts.VerticalLayout
  2. Drag and drop a DataGrid on to the design view
  3. Set the width of the DataGrid to 100% and height to 100%

Now let’s bind the data to DataGrid.

In this screen:

  1. Select the DataGrid
  2. Right click on the DataGrid
  3. Select Bind To Data

You will see a window launched with options to select the service as shown below.

In this screen:

  1. Select New service call
  2. Set the Service to ProductService
  3. Set the Operation to fill(…args): Product[]
  4. Set the Data Provider to Product[]
  5. Click on OK to continue

The fill(… args) function accepts optional parameters and so Flash Builder will automatically switch to code view to let you enter the arguments to be passed to the fill() function. In this example we will not pass any parameters, so leave the fill() function arguments empty as shown in the image below.

Switch to design view and you will see that the DataGrid will have columns for Product properties as shown in the image below.

Configuring DataGrid columns

Flash Builder 4 has an excellent feature which allows developers to configure columns. Select the DataGrid. Right click on the DataGrid and select “Configure Columns …” as shown in the image below.

A window with options to configure the columns for the DataGrid will be launched as shown in the image below.

In this screen:

  1. Use the up and down buttons to re-arrange columns as shown in the image above
  2. Click on OK

Save and run the application. Application will launch in the browser. You can observe the application sending request to the server and displaying the response in the DataGrid as shown in the image below.

More articles on how to use Flash Builder 4 are available at this URL https://sujitreddyg.wordpress.com/flash-builder-4/

We developed a Flex front end for Data Management service destination in just few minutes. Flash Builder 4 and LCDS rocks 🙂


Tutorial on model-driven development using Flash Builder 4 and LiveCycle DS 3

June 18, 2009

Updated for Flash Builder 4 release version and LiveCycle Data Services ES2 (LiveCycle DS 3) 🙂

In this article we will see how we can do model-driven development using Flash Builder 4 and LiveCycle Data Services ES2. We will create a Flex application to perform CRUD operations on a database table without writing code.

Install LCDS 3

Download LiveCycle Data Services 3 from this URL http://www.adobe.com/go/trylivecycle_dataservices. You will be downloading a file named lcds31-win.exe/lcds31-mac.zip, execute this file to install. I have installed LCDS 3 with Tomcat to C:\lcds3

Set up Adobe Application Modeling Plug-in (Formerly Fiber modeler plug-in)

Download Adobe Application Modeling plug-in from this URL Download Adobe Application Modeling Plug-in (20 MB. For Flash Builder 4 release version click on “For Eclipse 3.5 Download”). You will be downloading file named Adobe_Application_Modeling_plugin_v102_eclipse35.zip, extract the contents of the zip file to a folder called Adobe_Application_Modeling_plugin_v102_eclipse35. Copy the files under Adobe_Application_Modeling_plugin_v102_eclipse35/plugins folder into C:\Program Files\Adobe\Adobe Flash Builder\plugins.

Create sample database required

You can download the SQL file for the table used in this sample at this URL http://sujitreddyg.com/fb4articles/beta2/customers.sql.txt

Setting up data source

We need to expose databases as data sources. Fiber modeler plugin will use the data sources configured on the web server to get details of the tables in the database. In this sample, we will use lcds web application and the database created above. Add data source pointing to the database by modifying C:\lcds3\tomcat\conf\Catalina\localhost\lcds.xml as shown below. Make sure you have MySQL Connector/J in your tomcat lib folder.

<Context privileged=”true” antiResourceLocking=”false” antiJARLocking=”false” reloadable=”true”>

<Transaction factory=”org.objectweb.jotm.UserTransactionFactory” jotm.timeout=”60″/>

<Resource name=”jdbc/test” auth=”Container”

type=”javax.sql.DataSource”

username=”UserName”

password=”Password”

driverClassName=”com.mysql.jdbc.Driver”

url=”jdbc:mysql://localhost:3306/test?autoReconnect=true”/>

</Context>

Enabling RDSDispatchServlet

Flash Builder and Fiber Modeler plugin use the RDSDispatchServlet (part of LCDS) to retrieve information like data source, destinations, etc. by default the RDSDispatchServlet is commented out in web.xml. Open C:\lcds3\tomcat\webapps\lcds\WEB-INF\web.xml using a text editor and remove comment around RDSDispatchServlet Servlet definition and the URL mapping as shown below. Also set the useAppserverSecurity parameter value to “false” as shown below.

<servlet>

<servlet-name>RDSDispatchServlet</servlet-name>

<display-name>RDSDispatchServlet</display-name>

<servlet-class>flex.rds.server.servlet.FrontEndServlet</servlet-class>

<init-param>

<param-name>useAppserverSecurity</param-name>

<param-value>false</param-value>

</init-param>

<load-on-startup>10</load-on-startup>

</servlet>

<servlet-mapping id=”RDS_DISPATCH_MAPPING”>

<servlet-name>RDSDispatchServlet</servlet-name>

<url-pattern>/CFIDE/main/ide.cfm</url-pattern>

</servlet-mapping>

Start LCDS server

Start LCDS server from the start menu, start -> All Programs -> Adobe -> LiveCycle Data Services ES 3.0 -> Start LiveCycle Data Services Server

Please make sure both the database and the server are started.

We have everything ready to develop a Flex application using Flash Builder 4, Adobe Application Modeling plug-in and LCDS 3.

Create a Flex project

Start Flash Builder 4 from the start menu, start -> All Programs -> Adobe -> Adobe Flash Builder

Create a Flex project from the file menu as shown in the image below.

You will see a window launched with options to fill project properties as shown in the image below. Fill project properties as shown in the image below.

In this screen:

  1. Set project name to MDDSample
  2. Let the Application type be Web
  3. Use default Flex SDK (Flex 4.0)
  4. Set the Application server type to J2EE
  5. Select Use remote object access service check box
  6. Select LiveCycle Data Services ES
  7. Click next to continue

Now we need to set the server properties, you will see a screen with options to set the server properties as shown in the image below.

In this screen:

  1. Set the Root folder to c:\lcds3\tomcat\webapps\lcds
  2. Set the Root URL to http://localhost:8400/lcds
  3. Set the Context root to /lcds
  4. Leave the Output folder to default, which is on the server
  5. Click finish to continue

Flash Builder will create a project with a default application file. Now let’s build the model using Fiber Modeler Plugin. For the modeler plugin to retrieve data sources we configured, we need to configure RDS Server settings in Flash Builder.

Configure RDS Server

Select preferences from window menu as shown in the image below.

In the preferences window, you will find RDS configuration panel under Adobe -> RDS Configuration as shown in the image below.

Configure RDS Server for lcds web application as shown in the image below.

In this screen:

  1. 1. Set the description to LCDS (localhost)
  2. Set the host name to 127.0.0.1
  3. Set the port number to 8400
  4. Set the Context root to lcds
  5. Leave the User name and Password blank under the Security Information section
  6. Click on Test Connection to check if everything is properly configured
  7. Click OK to continue

We configured RDS, let’s create a model.

Creating model using Fiber Modeler plugin

Right click on the MDDSample Flex project and create new Data Model file as shown in the image below. If you cannot view Data Model in the options, you can select “other” and find Data Model under the Data Modeling as shown in the image below.

Click Next to continue. Window with option to fill model properties will be launched as shown in the image below.

In this screen, set the File name to Customer.fml and click on Next to continue.

In this screen, since we want to create model from a table in the database select From a database. Click Next to continue. Next screen will give you option to select the RDS server configured in previous steps and to view the data sources available.

In this step, we will select the database table from which the model has to be created.

In this screen:

  1. Set the RDS Server to LCDS (localhost), one we created in previous steps
  2. Data sources available will be listed down. Select java:/comp/env/jdbc/test
  3. Tables available in the data source will be listed, select customers table
  4. Click on Finish to continue

Fiber Modeler Plugin will create Customer.fml based on the Customers table. Adobe Data Model perspective will launched as shown in the image below.

In this screen click Yes to launch Adobe Data Model perspective. You will see Customer entity represented graphically as shown in the image below.

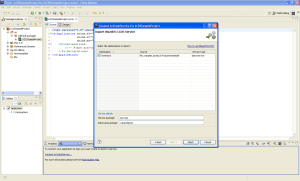
Let’s deploy this model to the server. Right click on the Customer.fml and select Deploy Data Model to LCDS Server as shown in the image above. Window with deployment options will be launched as shown in the image below.

In this screen:

  1. Set the RDS Server to LCDS (localhost)
  2. Set the model name to Customer
  3. Set the Database Tables to Unchanged
  4. Click on Finish to continue

Fiber Modeler Plugin deploys the Customer model to the server. LCDS 3 will create required assembler and also create a data management destination. All we have to do now is to see how we can consume the service and create a Flex application. With Flash Builder 4 this is very simple, let’s see how Data centric Development (DCD) features in Flash Builder 4 lets us easily consume data management services and bind them to UI controls.

Consuming data management services from Flash Builder 4

Switch to Flash perspective and Select MDDSample.mxml. You can switch perspective from right hand side top corner. Select the Data/Services panel also called services explorer as shown in the image below.

Now that we have our model deployed, we will consume the data in the Customers table and bind the data to a UI control. Click on the Connect to Data/Service link highlighted in the image above.

You will see a window launched with options to select the type of service as shown in the image below.

In this screen, select LCDS and click on Next to continue. Flash Builder will display a window asking for RDS credentials. Since we turned off security for our RDSServlet by setting the “useAppserverSecurity” parameter to “false” in the web.xml, select “No password required” and click on OK to continue.

Now Flash Builder will retrieve all the Remoting and Data Management destinations exposed by the web application and displays as shown in the image below.

You can see that a destination named Customer.Customers is created whose associated source class is fiber.data.assemblers.FiberAssembler and the service type is data-service. Select the destination and click on Finish to continue.

Flash Builder will generate all code required to consume the service selected and will list the CustomersService in the services explorer as shown in the image below.

You can also see that the return types are properly set. Now that we have the service created, let’s bind the data to a UI control. Switch to design view as shown in the image below.

In this screen:

  1. Set the layout of the Application to spark.layouts.VerticalLayout
  2. Drag and drop a DataGrid on to the design view
  3. Set the editable property of the DataGrid to true
  4. Set the width of the DataGrid to 100%

Now let’s bind the data to DataGrid.

In this screen:

  1. Select the DataGrid
  2. Right click on the DataGrid
  3. Select Bind To Data

You will a window launched with options to select the service.

In this screen:

  1. Select New service call
  2. Set the Service to CustomersService
  3. Set the Operation to getAll(): Customers[]
  4. Set the Data provider to Customers[]
  5. Click on OK to continue

You will see that the DataGrid will change its columns to reflect the properties of the Customers entity. Save the application and run the application. Application will launch in the browser. You can observe the application sending request to the server and displaying the response in the DataGrid as shown in the image below.

Let’s enable auto commit so that this will be a complete application. Switch to code view and add this line of code to enable auto commit as shown in the image below. Also set the DataGrid editable to true.

customersService.serviceControl.autoCommit = true;

Save and run the application. You can edit the data in the DataGrid and just press enter key, the data will automatically be committed in the database. Refresh the application to confirm.

More articles on how to use Flash Builder 4 are available at this URL https://sujitreddyg.wordpress.com/flash-builder-4/

We created a complete Flex application using Flash Builder 4 and LiveCycle Data Services 3 to perform operations on the data in the database in few minutes. Now that’s Rapid Application Development.

LCDS 3 Rocks 🙂


Adobe LiveCycle Data Services 3 beta is here

June 18, 2009

Adobe LiveCycle Data Services 3 beta is here. As always LCDS team has added lots of new features and made improvements to existing features. With LCDS 3 beta application development is much faster and developers can use features like Reliable communications and Data throttling.

We have new technology from Adobe, code named Fiber. Fiber lets you do model-driven development. With this release of LCDS, Adobe also released a graphical modeling editor called Fiber modeler plugin, which allows you to use Flash Builder 4 with LCDS 3 to create a complete RIA by just pointing to your tables in the database. You don’t have to write any server side code, LCDS 3 creates the assembler required, creates data management destination and hence all ready to consume it from Flex applications. We all know that with Flash Builder 4, consuming data services is just few clicks as explained at this URL https://sujitreddyg.wordpress.com/2009/06/01/building-flex-application-for-blazeds-remoting-service-using-flash-builder-4/

Tutorial on model-driven development using Flash Builder 4 and LiveCycle DS 3

Please find more details on what’s new in LiveCycle Data Services 3 beta at this URL http://www.adobe.com/devnet/livecycle/articles/lcdses3_whatsnew.html

I already downloaded LCDS 3 and am using it, it’s too good. Download LiveCycle Data Services 3 beta at http://labs.adobe.com/technologies/livecycle_dataservices3/

Adobe rocks 🙂


BlazeDS adapter to invoke multiple classes on a Remoting destination

January 22, 2009

What is this?

In BlazeDS and LCDS Remoting service, JavaAdapter class allows us to invoke methods on a Java object.  If we want to invoke methods on a Java class, we declare destination for each class we want to be invoked from Flex applications in remoting-config.xml.

I extended the default JavaAdapter and added very very few lines of code so that Flex application can invoke Java classes by specifying the Java class name in the Flex application. Don’t worry, modified adapter allows you to control access to classes using regular expression and other ways.

This will be useful if you have lots of classes, which you want expose as service. Instead of declaring destinations for each class in the remoting-config.xml file, you can use this adapter and expose all required classes by declaring one destination.

What does this adapter let me do?

1.       Specify the name of the Java class in Flex application and invoke methods on that class

2.       You can control access to classes based on regular expression. If you want to allow access to classes in “com.adobe” package only, you can set the source of the destination to “com.adobe.*”.

3.       Declare a default Java class, which will be used if Flex application doesn’t specify the Java class to be used.

4.       From the list of classes allowed in a package, you can exclude few classes

5.       You can specify scope for each class. For example you want instances of 2 classes in the allowed package to be stored in a session or application scope, you can do that.

How to use this adapter?

Adding adapter class to your web application classpath

Download the MultiClassJavaAdapter .java file from this URL http://sujitreddy.g.googlepages.com/MultiClassJavaAdapter.java

Compile it and copy that under WEB-INF/classes folder of your web application in appropriate package structure.

Declaring in remoting-config.xml

The remoting-cong.xml file is explained below. You can download the completed remoting-config.xml file from this URL http://sujitreddy.g.googlepages.com/remoting-config.xml

In the configuration file (remoting-config.xml) file downloaded, you can find we have added our adapter (com.adobe.remoting.adapters.MultiClassJavaAdapter) to the adapters list as shown in the XML snippet below.

<adapters>

<adapter-definition id=”any-java-object” class=”com.adobe.remoting.adapters.MultiClassJavaAdapter”/>

</adapters>

We have destination with id “AnyJavaClass” declared. This destination has its adapter set to the adapter added above using the adapter element.

<destination id=”AnyJavaClass”>

<adapter ref=”any-java-object”/>

</destination>

You can give a regular expression in the configuration file, which will be used to evaluate if a Java class can be invoked by the Flex application on this destination. You will use source property to specify this regular expression as shown below.

You can declare a default Java class, which will be used if the Flex application doesn’t specify the name of the Java class to use. Set the default Java class name using default-source element as shown below.

<destination id=”AnyJavaClass”>

<properties>

<source>com.adobe.*</source>

<default-source>MultiClassAdapterTest</default-source>

</properties>   </destination>

As per declaration above, Flex application can invoke any class under “com/adobe” folder. You might want not want to allow access for few classes in this package. In that case you can declare list of classes you don’t want to exclude as shown below.

<destination id=”AnyJavaClass”>

<properties>

<exclude-classes>

<class name=”com.adobe.ExcludeClass1″/>

<class name=”com.adobe.ExcludeClass2″/>

</exclude-classes>

</properties>    </destination>

By default when there is a request to invoke method on a class, a new instance of that class is created in the request scope. You might want to keep the instances created in application or session scope. Since we are allowing multiple classes to be invoked using single destination, you can declare names of the classes and scope in which you want to store them as shown below.

<destination id=”AnyJavaClass”>

<properties>

<classes-scopes>

<class name=”MultiClassAdapterTest” scope=”session”/>

<class name=”com.adobe.TestClass” scope=”application”/>

</classes-scopes>

</properties>    </destination>

Flex application to test the adapter

Download the MXML file from this URL http://sujitreddy.g.googlepages.com/MultiClassAdapterTesting.mxml

In the file downloaded, you can see that we will use the source property of the RemoteObject class to specify the name of the class to invoke the method on.

That’s it, now you can declare one destination and invoke methods on multiple classes. Still you can control access to classes.

Please feel free to use/edit/delete this class. Any suggestions are most welcome. 🙂

Adobe rocks 🙂