Data Centric Development (DCD) in Flash Builder 4 allows developers to build Flex front end for any back-ends very easily.
Spring BlazeDS project from SpringSource makes it easier to create spring powered Rich Internet Applications using Adobe Flex.
In this article we will see how we can use Adobe Flex, Flash Builder 4, BlazeDS, Spring, Spring BlazeDS and Java to create Rich Internet Application.
Lets start with setting up web application on the server.
Create Web Application
Start by creating a web application name springblazedssample. You can do that by creating a folder named springblazedssample under your web server document folder.
Set up BlazeDS
Set up BlazeDS for web application created in previous step as explained in this URL https://sujitreddyg.wordpress.com/2009/04/07/setting-up-blazeds/
Set up Spring BlazeDS
Download Spring BlazeDS from this URL http://s3.amazonaws.com/dist.springframework.org/release/FLEX/spring-flex-1.0.3.RELEASE.zip
You will be downloading file named spring-flex-1.0.3.RELEASE.zip. After downloading, extract the contents of spring-flex-1.0.3.RELEASE.zip into a folder called spring-flex-1.0.3.RELEASE. Copy org.springframework.flex-1.0.3.RELEASE.jar from spring-flex-1.0.3.RELEASE/dist folder to your web application under springblazedssample/WEB-INF/lib
Set up Spring
Download Spring from this URL http://s3.amazonaws.com/dist.springframework.org/release/SPR/spring-framework-3.0.2.RELEASE.zip
You will be downloading file named spring-framework-3.0.2.RELEASE.zip. Extract contents of spring-framework-3.0.2.RELEASE.zip into a folder named spring-framework-3.0.2.RELEASE. Copy all .jar files under spring-framework-3.0.2.RELEASE/dist folder to your web application folder under springblazedssample/WEB-INF/lib
Add Dependencies (3)
1. Download cglib-nodep-2.2.jar from this URL http://sourceforge.net/projects/cglib/files/cglib2/ Copy the same into your web application folder under springblazedssample/WEB-INF/lib
2. Download backport-util-concurrent .jar from this URL http://backport-jsr166.sourceforge.net/ Copy the same into your web application folder under springblazedssample/WEB-INF/lib
3. Download aopalliance.zip from this URL http://sourceforge.net/projects/aopalliance/files/ You will find aopalliance.zip under section called 1.0
Extract the contents of aopalliance.zip into a folder named aopalliance and copy aopalliance.jar into your web application folder under springblazedssample/WEB-INF/lib
Configuring Spring MVC Dispatcher and RDS Servlets
Download the web.xml with MVC Dispatcher servlet and RDS Servlet (used by Flash Builder) definitions and mappings from here http://sujitreddyg.com/fb4articles/springblazeds/web.xml. Replace springblazedssample/WEB-INF/web.xml with the downloaded web.xml
Configuring Spring managed beans
In this sample we will use SimpleCustomerService.java and SimpleCustomer.java. We will configure SimpleCustomerService as spring managed bean and expose the same as Remoting Service to consume from Flex application. Download web-application-config.xml from here http://sujitreddyg.com/fb4articles/springblazeds/web-application-config.xml Place web-application-config.xml in your web application folder under springblazedssample/WEB-INF/config folder.
In web-application-config.xml:
- We configured BlazeDS Message Broker Servlet as spring managed bean using <flex:message-broker/> tag.
- We exposed SimpleCustomerService bean (id=CustomerService) as BlazeDS Remoting Service destination by adding <flex:remoting-destination/> tag.
Download the Java class files used in this sample from here http://sujitreddyg.com/fb4articles/springblazeds/javaclasses.zip. You will be downloading a file named javaclasses.zip. Extract javaclasses.zip into a folder named javaclasses and copy folder named com under javaclasses into your web application folder under springblazedssample/WEB-INF/classes folder.
We have our server environment setup; lets create Flex application, which consumes SimpleCustomerService exposed as Remoting service destination.
Install Flash Builder 4
Download and install Flash Builder 4 from here http://www.adobe.com/products/flashbuilder/
Create new Flex project
Create new Flex from File -> New -> Flex Project menu.
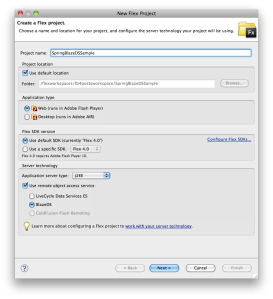
Enter project details
In this screen:
- Set project name as SpringBlazeDSSample
- Set “Web (runs in Adobe Flash Player)” as the application type
- Use default Flex SDK (Flex 4.0)
- Set the application server type to J2EE
- Select BlazeDS
- Click Next to continue
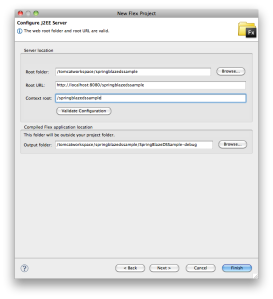
Configure J2EE server settings
In this screen:
- Set the Root folder to the root folder of your web application with BlazeDS configured. Its /tomcatworkspace/springblazedssample in this sample
- Set the Root URL to root URL of your web application. Its http://localhost:8080/springblazedssample in this sample.
- Set the Context root to context root of your BlazeDS enabled web application (springblazedssample).
- Leave the output folder to default value.
- Click on validate configuration button and see if the configuration is valid.
- Click finish to continue.
DCD or Data-Centric Development is one of the advancements to the Flash Builder 4. Let’s see how easily we can create a Flex application that consumes BlazeDS Remoting service (SimpleCustomerService) using DCD.
Creating Service using DCD
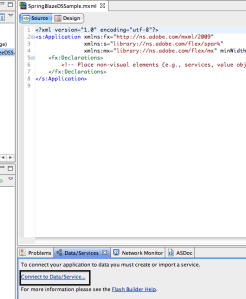
- Select the Data/Services window shown in the image above. If this is not visible, select it from Window -> Data/Services
- Click on “Connect to Data/Service” (highlighted in the image above) in the Data/Services window
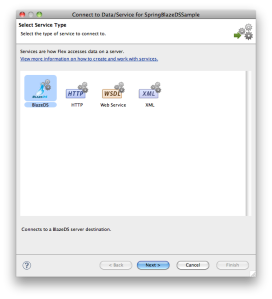
- Window as shown in the image below will be launched
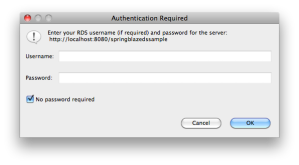
Select BlazeDS and click on Next. Flash Builder will display a window asking for RDS credentials. Since we turned off security for our RDSServlet by setting the “useAppserverSecurity” parameter to “false” in the web.xml, select “No password required” and click on OK to continue.
Selecting Remoting destination
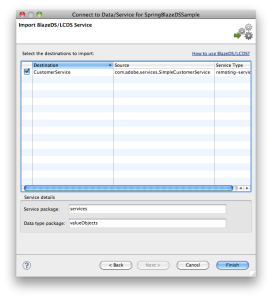
You can see that Flash Builder listed SimpleCustomerService bean exposed as Remoting Service destination using <flex:remoting-detination/> tag. Similarly any other Remoting service destinations will be listed here. Select a destination (CustomerService in this sample) for which you want the code to be generated and click on Finish to continue.
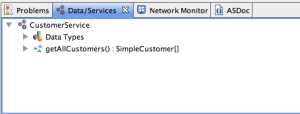
Code for invoking the Remoting service will be generated, you can see the service and its operations (public methods of the Java class) being displayed in the “Data/Services” window in the image below and source files for the same in Flash Builder package explorer.
Flash Builder 4 introspects return types for the Java class methods and creates AS3 classes for any custom Java data types.
Binding data/service to UI controls
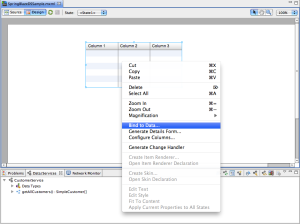
Other than generating code to consume services from Flex applications, Flash Builder can also generate code to bind the service result to a UI component. Switch to design view and add a DataGrid component as shown in the image below.
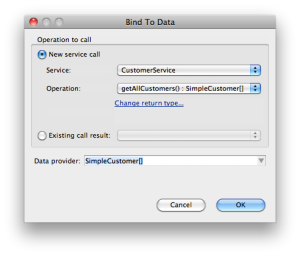
Select the DataGrid. Right click on the DataGrid and select “Bind to Data …” as shown in the image above. A window as shown in the image below will be launched.
In this screen:
- Select “New service call”.
- Select “CustomerService” from the list of services.
- Select “getAllCustomers():SimpleCustomer[]” from the operations list.
- Select SimpleCustomer[] as Data Provider.
- Click OK to continue.
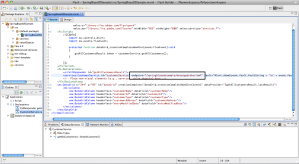
Switch to code view and set the endpoint property of the CustomerService (CustomerService instance added to SpringBlazeDSSample.mxml) to /springblazedssample/messagebroker/amf as shown in the image below.
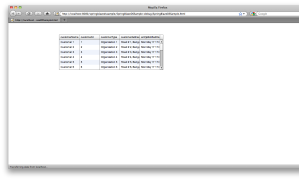
Save and run the application. Your application will invoke the getAllCustomers() method in SimpleCustomerService class on the server and displays the returned data in the DataGrid as shown in the image below.
You can find more tutorials on Flash Builder 4 here https://sujitreddyg.wordpress.com/flash-builder-4/
Adobe Flex Rocks 🙂


 Posted by Sujit Reddy G


