Updated for Flash Builder 4 release version 🙂
You have a database table and want to create a Flex application using which you can perform CRUD operations on the database table? Flash Builder 4 makes it easy for you. Flash Builder generates PHP file with skeleton code to query data from the database. You just have to write your SQL queries for your database in the generated PHP file use Flash Builder 4 to generate Flex application. Continue reading this article to know how.
In this article will use Flash Builder Data Centric Development (DCD) feature to create a PHP file to query data from the database and Flex application which will consume the objects returned by the PHP class.
We will be using a table called customers in this sample. You can download the sql file from this URL http://sujitreddyg.com/fb4articles/beta2/customers.sql.txt
Install Flash Builder 4
Download and install Flash Builder 4 from this URL http://www.adobe.com/products/flashbuilder/
Create a new Flex project
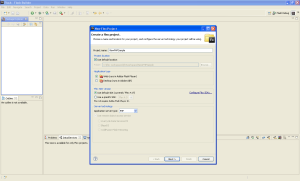
Create new Flex project from File -> New -> Flex Project
Enter project details as shown in the image above and explained below
In this screen:
- Set the project name to “NewPHPSample”
- Set the Application type to “web (run in Adobe Flash Player)”
- Use default Flex SDK (Flex 4.0)
- Set the Application server type to “PHP”
- Click next to continue
Configuring server settings
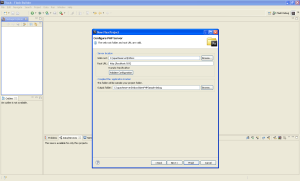
In this screen:
- Set the Web root to the root folder of your PHP server. Its c:\apacheserver\htdocs in this sample
- Set the root URL to the root URL of your PHP server. Its http://localhost:9292 in this sample
- Set the output folder to root folder of your web application where you want the PHP file to be deployed
- Click the “Validate Configuration” to validate the server details entered
- Click on finish to continue
Using DCD to consume data returned by the PHP file
DCD or Data-Centric Development is one of the advancements to the Flash Builder 4. Let’s see how this is making developers productive. We will use DCD to consume the data from the PHP file.
Creating a service
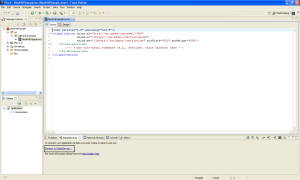
- Select the Data/Services window shown in the image above. If this is not visible, select it from Window -> Data/Services
- Click on “Connect to Data/Service” (highlighted in the image) in the Data/Services window
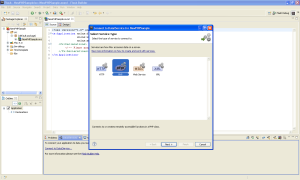
- Window as shown in the image below will be launched
Selecting service type
Since we want to communicate with the PHP class, select PHP and click on next to continue.
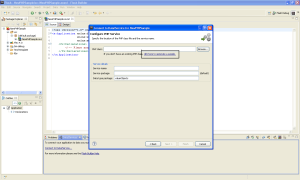
Setting service properties
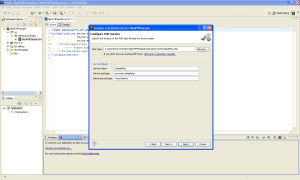
Since we don’t have the PHP class created and want Flash Builder to generate a sample PHP file. Click on the “click here to generate a sample” (highlighted in the image above) A window will be launched as shown in the image below.
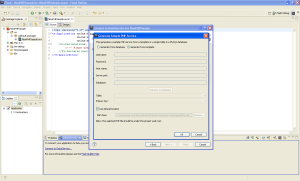
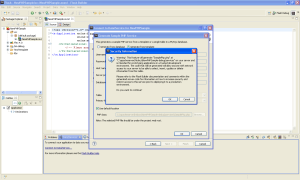
Select the “Generate from template” option and click on OK to continue. Take a minute to read the message displayed by Flash Builder as shown in the image below.
Click OK to continue. You will observe that a sample PHP file will be create and the service settings will be updated to point the newly created PHP file as shown in the image below.
Click Next to continue.
You will see a window displayed, saying Zend AMF library will be installed as shown in the image below. Just click on OK and continue will the set up. Flash Builder will deploy the Zend AMF on your PHP server.
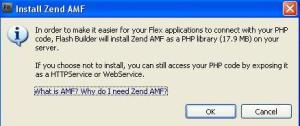
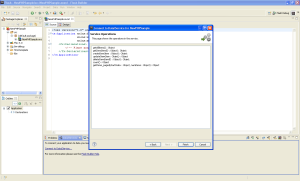
Once the installation completes, Flash Builder will display a message. Clicking OK will display the functions in the PHP class. Functions are referred as “operation”. Image below shows the window with operations exposed.
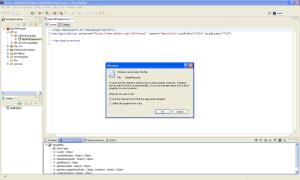
You can see that the generated sample PHP file has functions for all CRUD operations and more functions, which can be used for enabling client side data management using Flash Builder 4. Click finish to continue. You can see the service created and its operations listed in the services explorer in the image below. Flash Builder will also try to open the created PHP file, we can view the file from the Flash Builder itself, you can just click on cancel.
Completing the PHP class generated
The PHP class generated by the Flash Builder contains skeleton code to connect to a database. You just have to change the SQL queries to query your database table. I updated the generated PHP file to retrieve data from the customers table. Download the updated the PHP file from this URL http://sujitreddyg.com/fb4articles/beta2/SamplePhp.php.txt and replace the generated file.
Note: Please set the username, password, server, port, tablename and databasename variables in SamplePhp.php
Configuring return type
In this step we will test the operation and configure the return type on the client i.e. we will specify what type of object to create with the response from the server. This will make it easy for us to develop, since it is easier to deal with strong typed objects.
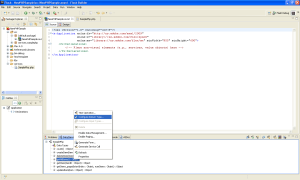
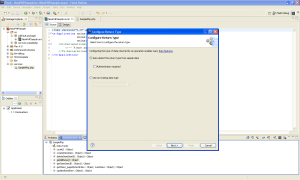
Right click on the “getAllItems()” operation in the services explorer and select “Configure return type” as shown in the image below.
A window as shown in the image below will be launched with options to configure the return type. You can chose an existing data type or let the Flash Builder generate VO classes based on the response from the server. Let’s leave it to the Flash Builder to generate required VO classes based on the server response as shown in the image below.
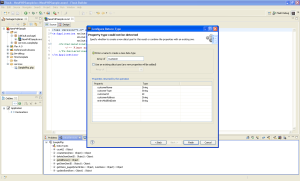
Click next to continue. You can see the response from the server in the window as shown in the image below.
You can see that Flash Builder introspected the objects returned from the server. Change the name of the data type to “Customer”. When we invoke the “getAllItems” operation, response will be object of the type “Customer”, in our case ArrayCollection containing Customer objects.
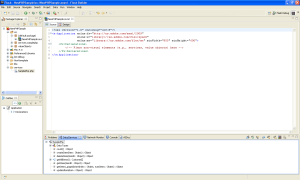
Click on finish to continue. You can see the return type of the operation changed as shown in the image below.
We will be using only getAllItems() so, we are not configure return types for other operations in this sample.
Displaying or binding service results in UI controls
We usually write code to display the response from the service in a DataGrid or any other control. Flash Builder 4 has an awesome option which allows you to bind a service response to a control with just a click.
In this screen:
- Switch to design view
- Change the Application layout to “spark.layouts.VerticalLayout” using the properties panel
- Drag and drop a “DataGrid” from the “components” panel on to the design area
- Set the width and height properties of the “DataGrid” to 100%
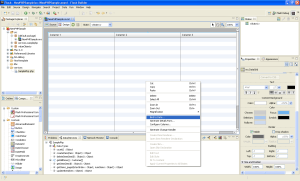
Right click on the DataGrid and select “Bind to Data …” as shown in the image below.
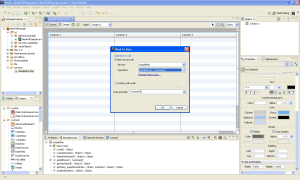
A window as shown in the image below will be launched.
In this screen:
- We select a “New service call” because there are no existing services in the current application.
- Select the “CustomerService”
- Select “getAllItems():Customer[]” from the operations list
- Set the Data provider to “Customer[]”
- Click OK
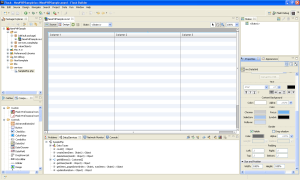
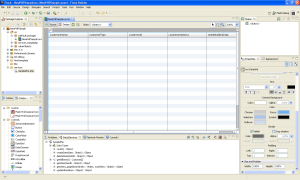
You can see the DataGrid in the design updated with properties of the Customer object as shown in the image below.
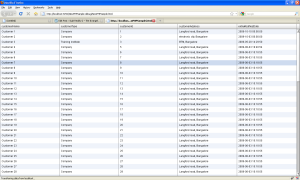
Save and run the application, you can see the data retrieved from the Remoting service and displayed in the DataGrid as shown in the image below.
More article on using Flash Builder 4 https://sujitreddyg.wordpress.com/flash-builder-4/
That’s it we created a Flex UI for a data base. Flash Builder 4 rocks 🙂


I am trying to use a PHP Service to populate a combobox and the pass the selectedItem to a detail form. I cannot get it to work. What i really need is to pass the selectedItem to an insert for a database. Any Ideas?
Same problem as that of jon 🙂
I have the same question. I’m looking for a tutorial that takes us farther — how data controls then work together.
Hi all,
I created a article very quickly on how to achieve what you asked for using Flash Builder 4. Please find article at the URL below. Its a PDF document. 🙂
Click to access PHPGetAndUpdate.pdf
we will definitely post more articles, please do let us know if there are any topics for which there are no articles 🙂 Thank you.
Hope this helps.
Hi,
How can one deploy these applications onto the actual web server?
As in, wouldn’t you need to install ZF there, and are there other settings to change as well? (Like the ones we set in the project properties)
First – thank you, Sujit Reddy G, for providing excellent info to the community – it is appreciated.
I was wondering if you could tell how I can Configure PHP Service WITHOUT PHP/ZF installed on my local machine? I do have PHP/ZF on my shared server…
Thank you in advance for time…
Hi Tuse,
yes, you need deploy Zend AMF on the remote server. Setting up Zend AMF is as simple as copying files on to the server. For using the FB4 generated code, as of now you should change the end point URL in the code before compiling the SWF file and deploying it.
Hope this helps.
Hi PRJ,
I haven’t tried this, but please try pointing Flash Builder 4 to the remote location when creating the project and hte URL to the remote server. Kindly let me know if this worked.
The combobox example is good but what about if the value for the ComboBox is in another table? Is it better to use two seperate Services? I.E I have a schools table and a content table, the content table has the school_id referenced ( Not Foreign Key) . I want to be able to select a a school and then insert/update content.
Thanks a lot Sujit, i will work on that
My question is just about changing the end point URL, I don’t find where I change it.
I did a small app with components point for one directory where the PHP classes are, but on the production server I want to relocate them.
Thanks
Hi jcarlos,
You can change the directory by modifying the amf.directories[] property in the amf_config.ini under your web application root folder.
Hope this helps.
Could you please give examples of what the amf_config.ini should look like for a remote server. What should be in the “webroot” field?
Hi Sujit,
Thanks for all the great article you have shared.
I have gone through some videos on youtube about retrieving, creating, updating and deleting data from mysql server through Flash 4 GUI using php service. I am doing exactly what those videos says (and what’s in your this article as well), but it works for retrieving data but doesn’t work for inserting data. Kindly let me know if you have any article related to inserting data in mysql.
Thanks in advance.
Regards,
Uzair